
Last updated: November 16, 2026
Quick Answer: a full E61 group head clean-and-rebuild is usually a 1-session job with about 8 core parts to inspect or replace, and the fix is to strip the cam and valves, clean the brass parts, replace worn seals and valve pieces, then reassemble with a food-safe grease on the cam pins and sliding surfaces. If the lever squeaks, the action feels gritty, or the group leaks from the exhaust side, this is the repair that usually fixes it. In this guide to How to Clean and Rebuild an E61 Group Head: Cam, Valves, and Lubrication Guide, the goal is a smooth lever and a sealing valve stack, not a cosmetic clean.
Key takeaways
- A gritty lever usually points to dried grease, coffee residue, or a worn cam path, not just a dirty shower area.
- Aggressive detergent backflushing can strip the light oil film inside the cam area, so the lever may need fresh food-safe grease after cleaning.
- The brass mushroom, triangular cam, teflon seal washer, and valve springs all matter; one tired part can make the whole group misbehave.
- A full rebuild is more than a wipe-down, but it is still a practical job if the parts come apart cleanly and nothing is seized.
- If the group still leaks after new seals and valve parts, the seat, stem, or housing may be worn enough that parts replacement no longer solves it.
What an E61 group head rebuild fixes
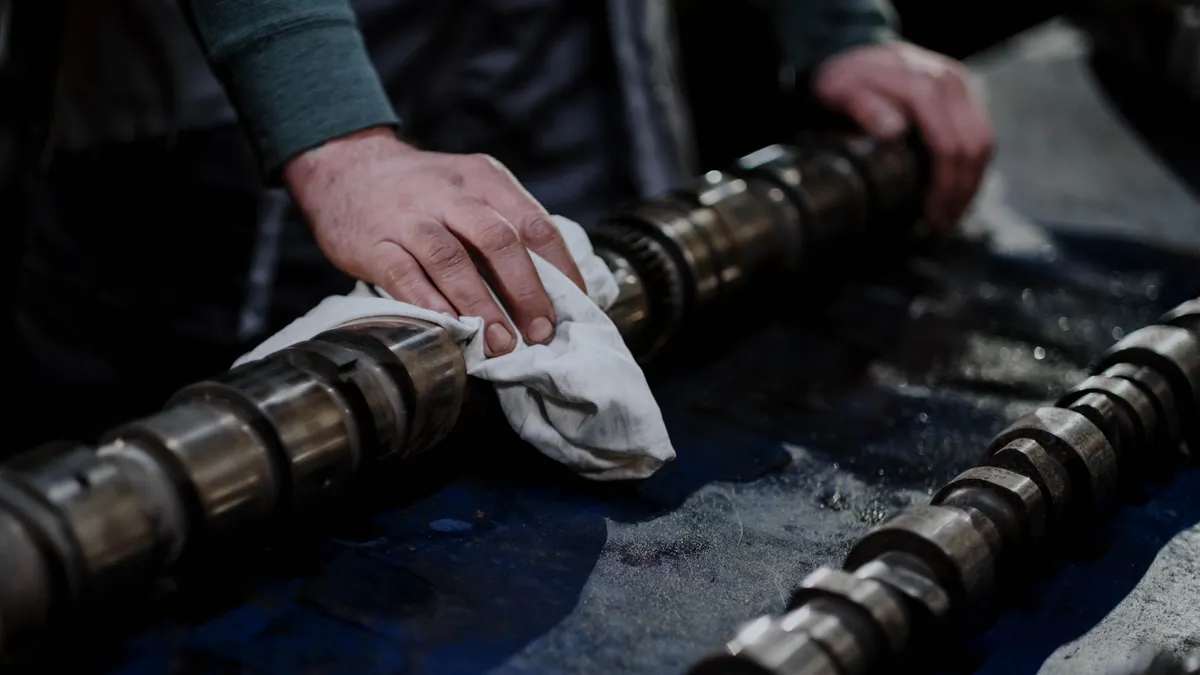
A rebuild fixes the parts that move, seal, and vent inside the E61 group head assembly, not the cosmetic grime on the outside. The usual targets are the cam, the pre-infusion valve, the exhaust valve, the brass mushroom, the triangular cam, and the teflon seal washer. Those parts handle heat, water, scale, and espresso oils, so they wear in different ways.
Therefore, a dirty lever is one sign, and slow spring return, a thin leak from the exhaust side, and a harsh feel at the top of the lift are others. A quick wipe cannot cure worn brass or a flattened seal washer, and it will not restore the cam track if old detergent has stripped away the grease film; if the seat, stem, or housing is worn, consult a professional service technician or source the correct replacement parts from the machine maker or parts supplier. That is why a simple clean and a true rebuild are not the same job.
This guide is aimed at a reader who wants the group back to a smooth, positive lever feel without tearing into unrelated parts like the shower screen or the main brew gasket. It does not cover how to backflush an espresso machine, and it does not cover shower screen replacement. It stays with the moving valve stack and the lubrication points that keep the group working.
If you already use a home espresso machine maintenance schedule, this repair sits in the deeper end of that routine, after normal flushing and before bigger hardware changes. For a related step, see the espresso machine maintenance guide and the backflushing guide.
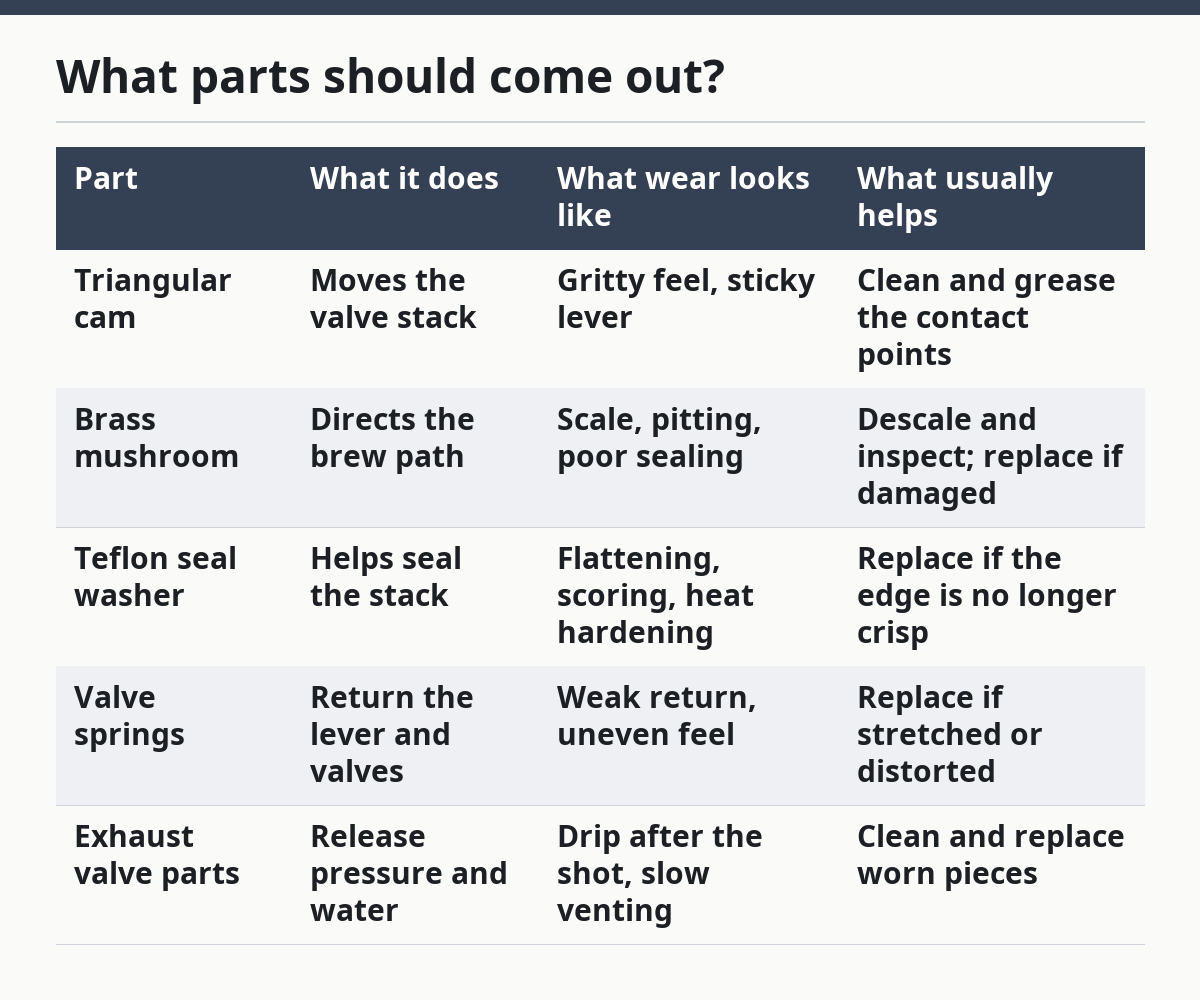
What parts should come out?
The parts that should come out are the cam, the valve stems, the springs, the brass mushroom, and the seals that sit in the valve path. On many E61 groups, the triangular cam drives the valve movement, while the mushroom and exhaust side handle the water path and venting. A teflon seal washer may also sit in the stack and should be inspected for shape and heat wear.
The point is not to remove everything that can move. The point is to remove the parts that seal or slide and can be cleaned without damaging the group body. If a stem is bent, a spring is weak, or a seal edge is cut, cleaning alone will not cure the leak; if the diagnosis is uncertain, consult a professional or compare the part to the manufacturer’s service parts list before buying replacements. The worn part has to leave the stack.
Keep the parts in order as they come out. A bench tray with separate spots for the cam, mushroom, spring, washer, and fasteners saves time when reassembly starts. The difference between a smooth rebuild and a frustrating one is often just order, not force.
| Part | What it does | What wear looks like | What usually helps |
|---|---|---|---|
| Triangular cam | Moves the valve stack | Gritty feel, sticky lever | Clean and grease the contact points |
| Brass mushroom | Directs the brew path | Scale, pitting, poor sealing | Descale and inspect; replace if damaged |
| Teflon seal washer | Helps seal the stack | Flattening, scoring, heat hardening | Replace if the edge is no longer crisp |
| Valve springs | Return the lever and valves | Weak return, uneven feel | Replace if stretched or distorted |
| Exhaust valve parts | Release pressure and water | Drip after the shot, slow venting | Clean and replace worn pieces |
How do you clean the cam and valves?
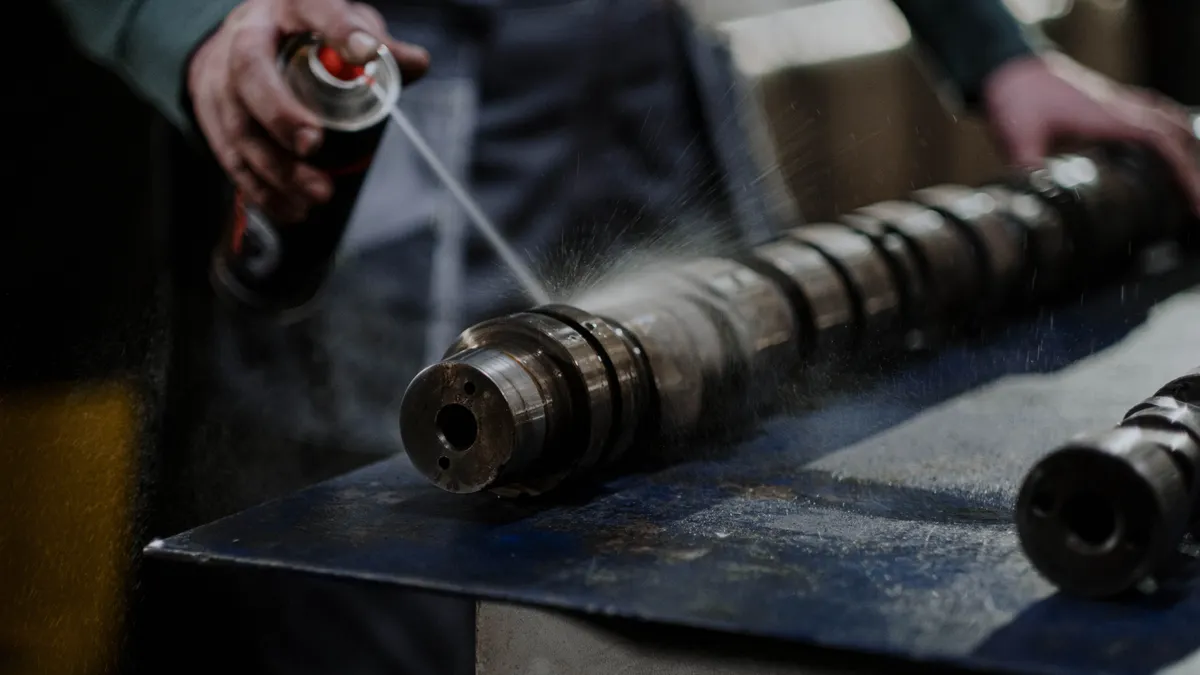
You clean the cam and valves by removing old grease, coffee residue, and scale without scratching the brass or cutting the seals. A nylon brush, a small container, a towel, and a food-safe cleaner are the basic tools. Strong metal tools are a bad choice because they can score the cam path or nick the valve seats.
- Remove the outer lever parts with the correct wrench and place the triangular cam, springs, and valve pieces in order.
- Wipe the cam and brass mushroom with a lint-free cloth to lift loose grease before any wet cleaning starts.
- Brush the brass parts with a nylon brush and food-safe cleaner until the dark film is gone from the moving surfaces.
- Soak only the removable brass pieces for a short time if scale is heavy, then dry them fully before reassembly.
- Inspect the teflon seal washer, valve stems, and spring ends for cuts, flats, or pitting.
- Replace any worn seal or bent spring instead of putting it back just because it looks close enough.
- Dry every part completely so new grease is not diluted by water.
- Check the cam path and valve faces for smooth metal, not rough edges or paste-like residue.
Do not flood the group body with cleaner. The body is not the part that needs a soak, and excess liquid can move dirt deeper into the assembly. A careful clean is enough for most rebuilds, while a heavy soak belongs only on the removable brass pieces. If the mushroom is badly scaled, the damage may be more than a cleaning can fix.
A good clean leaves the cam shiny but not polished like chrome, and it leaves no sticky film on the valve faces. The parts should look dry, clean, and ready for a thin coat of grease on the sliding metal only. For water-scale cleanup, see the descaling guide and the group-head cleaning guide.
How do you grease an E61 cam the right way?
You grease an E61 cam with a thin film of food-safe silicone grease, not a thick layer that can trap dirt. A manufacturer datasheet for Molykote 111 describes it as a silicone compound used for valves and seals, which is why it is commonly chosen for this kind of contact point. Use it on the brass cam pins, the sliding faces that touch the cam, and any other metal-to-metal motion surface called for by the group design.
The big mistake is over-greasing. A heavy blob migrates, picks up coffee fines, and turns into a dark paste that makes the lever feel worse in a few weeks. The other mistake is using the wrong grease, especially one that is not intended for food-adjacent service. The group is a water path, so the lubricant choice matters.
| Option | Where it belongs | Good point | Weak point |
|---|---|---|---|
| Food-safe silicone grease such as Molykote 111 | Cam pins and sliding metal contact points | Stable and suitable for this service | Too much grease attracts dirt |
| No grease | Only where the design does not call for it | Nothing to contaminate the path | Lever can squeak and wear faster |
| General-purpose grease | Not recommended here | Easy to find | Wrong choice for a wet, hot coffee group |
Apply the grease sparingly with a fingertip or small swab. The metal should look wet, not coated. A thin film is enough for the lever to move quietly, and it is enough to protect the cam from the dry, harsh feel that shows up after detergent backflushing. This is the part of the job where less is better.
How do you rebuild the valve stack?
You rebuild the valve stack by installing the cleaned or replaced pieces in the same order they came out and by making sure each seal seats flat. Start with the valve parts that belong deepest in the group, then work back out toward the lever and cam. If the brass mushroom, teflon seal washer, or exhaust valve pieces are upside down, the group can leak or vent badly.
The rebuild should feel calm, not forced. Threads should start by hand, springs should sit straight, and the lever should move without a metallic scrape. If a part will not seat with light pressure, stop and inspect it. Forcing the stack can damage the seat or crush a seal, which turns a small repair into a bigger one.
A useful habit is to compare the old parts and the new ones side by side before the first screw goes back in. A worn washer may look only slightly thinner, but that small change can be enough to change sealing pressure. The same is true for a spring that has lost its shape. A part that looks “close enough” is often the reason the job has to be done again.
After reassembly, move the lever through its full travel by hand. It should rise smoothly, pause where it should, and return with a firm, even feel. If the motion catches at one point, do not assume it will fix itself with use. That is usually a sign of a misseated cam or a dry contact point. For more on the lever mechanism, see the E61 lever parts guide and the brew group rebuild kit page.
What mistakes make the rebuild fail?
The mistakes that make the rebuild fail are too much grease, mixed-up parts, and skipping worn seals because they still look usable. A lever can still move after a bad rebuild, which makes the mistake easy to miss, but the group may start leaking again within days or feel rougher than before. A small leak at the exhaust side is often a clue that one seal or valve piece was not seated right.
The other common mistake is cleaning the brass but ignoring the cam path. If the lever system still has dried residue or abrasive dirt in the track, new grease will not stay clean. That leads to a gritty lever and a shortened service interval. Another error is using steel tools to scrape scale from the seating face. One scratch can become a repeat leak.
Some readers should not do a full teardown if the group body is heavily seized or if a fastener begins to twist instead of turn. At that point, the risk of damaging the assembly is higher than the benefit of guessing through it. A stuck part that snaps is a different job from a normal clean and rebuild, and it needs more than patience.
When should you stop and replace parts?
You should stop and replace parts when the brass mushroom is pitted, the teflon seal washer is flattened, or the exhaust valve still leaks after cleaning and correct assembly. Cleaning fixes residue; it does not rebuild a worn seat. If the lever remains noisy after fresh grease, the cam surface or pin may be worn enough that lubrication alone will not solve it.
This is also the point to be honest about the trade-off. A full parts swap takes more time and costs more parts, but it is cheaper than repeating the same rebuild twice. If the group has one bad seal, replacing that seal is enough. If the valve faces and springs are tired as a set, replacing only one piece can leave the job half done.
A dependable rule is simple: if a part has a shape problem, replace it. If it only has residue, clean it. That line keeps the rebuild focused and prevents overbuying parts that do not need to go in the bin. If you are unsure, consult a professional or use the machine’s parts diagram to match the wear pattern to the correct replacement.
How often should you rebuild an E61 group?
You should rebuild an E61 group when the lever starts to squeak, the feel gets rough, or the group begins to leak in a way cleaning cannot fix. There is no universal calendar for every setup, because use, water quality, and detergent habits change the wear rate. A machine that sees aggressive detergent backflushing may need cam lubrication sooner than one that gets gentler care.
The stronger sign is feel, not a fixed date. A smooth lever that still seals well does not need a rebuild just because time passed. A noisy lever with a good seal may only need cleaning and fresh Molykote 111 on the cam pins. A leaking exhaust side points more toward worn valve pieces or a seal washer than toward simple grease loss.
For a broader upkeep plan, this repair belongs beside the rest of the home espresso machine maintenance schedule rather than replacing it. Daily rinsing, routine flushing, and this deeper service each handle a different layer of wear. That separation keeps the group clean without turning every service into a full teardown. See also the home espresso machine maintenance schedule and the daily flush routine.
Why is my e61 lever squeaking?
A squeaking E61 lever usually means the cam contact points are dry, dirty, or both. Food-safe silicone grease on the brass cam pins and sliding faces usually quiets the motion, but only after old residue is removed first. If the squeak remains after cleaning and greasing, the cam track or pin may be worn or misaligned.
How often should you rebuild an e61 group?
An E61 group should be rebuilt when the lever feel changes, the group leaks, or the valve stack no longer seals properly. There is no single interval that fits every setup, because detergent use, water quality, and shot volume all affect wear. A rebuild is a symptom-based job, not a calendar-only job.
Drafted with AI; not yet reviewed by a person.



One thought on “How to Clean and Rebuild an E61 Group Head”